FROM MEAN TO LEAN
February 5, 2020
By Jesus Manuel Gallego Romero, Software Engineer at LeanXcale
In this post, I will show how we can use the LeanXcale database to build a web application following the MEAN framework, substituting MongoDB by LeanXcale, which gives birth to the LEAN stack: LeanXcale + ExpressJS + Angular + Node.js. This post will use the Node.js JDBC driver and will precede a second post which will use the LeanXcale Java direct API to connect Node.js and LeanXcale.
LeanXcale is a database designed for fast-growing companies. It is a scalable SQL database with fast NoSQL data ingestion and GIS capabilities.
On the other hand, MEAN stack is a JavaScript-based collection of technology used for building dynamic web applications. Among the technology that forms this stack, we can find MongoDB, ExpressJS, AngularJS and Node.js.
I propose LEAN stack to take advantage of several of LeanXcale’s features:
a) LeanXcale provides a dual interface: a NonSQL API that provides fast key-value access, and an easy-to-use SQL. The former is oriented to fast ingestion and the latter is more suited to do complex search queries that are usually difficult with the MEAN stack.
b) LeanXcale maintains the same architecture from MVP to global deployments. LeanXcale scales out linearly from one small server, optimal for an MVP, to hundreds of nodes, ready for the most demanding environments.
c) LeanXcale is a full ACID database. Transactionality is interesting in some common use cases.
d) LeanXcale can grow dynamically since it’s ready to move data regions to a new node without an end-user impact. That means that you can adapt dynamically the number of nodes in a cluster.
We will build a CRUD (create, read, update and delete) web application based on this post, using the Node.js JDBC driver to connect to the LeanXcale instance.
NOTE: The application will use Angular and not AngularJS.
This post will not provide a step-by-step tutorial on how to build the application, but rather a general overview of the architecture. However, it will explain the details on how to use the Node.js JDBC driver with LeanXcale. For building the application, I recommend following the original post and then applying the changes required to integrate LeanXcale or go directly to the full code on our Git repository.
Technical development
The most interesting aspect of this article concerns how we can integrate LeanXcale with Node.js, so I won’t go into much detail about the frontend application, but instead, I will focus on the interaction with the database.
DATABASE CONNECTION
For connecting to the database, we will use the Node.js JCBC driver. We will create and export the connection in connection.js, to be used by the routing module of our application. This driver instantiates a JVM using the jinst library inside the JDBC package and sets some configuration variables, as well as the path to our JDBC client JAR. The JDBC client for LeanXcale can be downloaded from our webpage.
var JDBC = require('jdbc');
var jinst = require('jdbc/lib/jinst');

if (!jinst.isJvmCreated()){
 jinst.addOption("-Xrs");
 jinst.setupClasspath(['./lib/qe-driver-0.400-20200121.154643-28-jdbc-client.jar']);
}
We configure the JDBC connection properties in a JavaScript object defining the connection endpoint, the driver class to execute and the credentials for our database.
var conf = {
 url:'jdbc:leanxcale://localhost:1529/APP',
 drivername: 'org.apache.calcite.jdbc.Driver',
 properties: {
   user:'JESUS',
   password: 'JESUS'
 }
};
The only step to be done is to initialize the connection and check that there has not been any error in the initialization.
var lx = new JDBC(conf);
//initialize the connection
lx.initialize(function(err) {
 if (err) {
   console.log(err);
 } else{
   console.log('Connection initialized without error')
 }
});

module.exports = lx;
DATABASE PREPARATION
In this step, we will connect to the LeanXcale database using the provided CLI SQL client lxClient to create the schema, in this case formed by only one table.
In the server where our LeanXcale database is running, we connect to the database using the LeanXcale uri defining the database (APP) and the credentials. In a terminal, we execute:
(venv) jesus@patricio-XPS-13-9360:~/Downloads/postNodeLX/LX-BIN/scripts$ lxClient
sqlline version 1.8.0
lx> !connect jdbc:leanxcale://localhost:1529/APP JESUS JESUS
Connecting to jdbc:leanxcale://localhost:1529/APP
Connected to: LeanXcale (version unknown version)
Driver: LeanXcale JDBC Driver (version unknown version)
Autocommit status: true
Transaction isolation level TRANSACTION_REPEATABLE_READ is not supported. Default (TRANSACTION_NONE) will be used instead.
Once connected, we create the table to be used by the application. The table has a primary key which is the book’s ISBN, which must be unique, some string containing different information such as the title or the author and the date when it was created.
lx> CREATE TABLE LEANTABLE(
.)>     isbn VARCHAR(255),
.)>     title VARCHAR(255),
.)>     author VARCHAR(255),
.)>     published_year VARCHAR(255),
.)>     publisher VARCHAR(255),
.)>     updated_date Date,
.)>     CONSTRAINT pk_leantable PRIMARY KEY (isbn));
No rows affected (0.847 seconds)
DATABASE INTERACTION
Using ExpressJS routing, we can define the logic to be executed by the backend Rest API. This logic is implemented in the routes/book.js file, where we define the database operation for the desired http request under a specific path. To interact with the database, we import the previously exported database connection.
var lx = require(‘../connection.js’);
Also, we will define as constants the SQL queries to create the preparedStatements that will be executed later by the application.
const GET_ALL_BOOKS = 'SELECT * FROM JESUS.LEANTABLE';
const GET_SINGLE_BOOK_BY_ID = 'SELECT * FROM JESUS.LEANTABLE WHERE ISBN = ?';
const SAVE_BOOK = 'INSERT INTO JESUS.LEANTABLE values (?, ?, ?, ?, ?, CURRENT_DATE)';
const UPDATE_BOOK = 'UPDATE JESUS.LEANTABLE SET TITLE=?, AUTHOR=?, PUBLISHED_YEAR=?, PUBLISHER=?, UPDATED_DATE=CURRENT_DATE WHERE ISBN = ?';
const DELETE_BOOK = 'DELETE FROM JESUS.LEANTABLE WHERE ISBN = ?';
LIST ALL BOOKS
This functionality will be offered by the REST API under the root path. To invoke it, it will receive an HTTP GET request and it will return the resultset in json format to the AngularJS application. It creates a JDBC connection, creates a statement, executes a select * query, and then returns the result.
/* GET ALL BOOKS */
router.get('/', function(req, res, next) {
 lx.reserve(function(err, connObj) {
   console.log('Using connection ' + connObj.conn);
   var conn = connObj.conn;
   asyncjs.series([
       function(callback) {
         conn.createStatement(function (err, statement) {
           if (err) {
             console.log(err);
             callback(err);
           } else {
             statement.executeQuery(GET_ALL_BOOKS, function (err, resultset) {
               if (err) {
                 console.error(err);
                 callback(err);
               } else {
                 resultset.toObjArray(function(err, results) {
                   if (results.length > 0) {
                     console.log(results);
                     res.json(results);
                   }
                   callback(null, resultset);
                 });
               }
             });
           }
         })
       }
     ], function(err, results) {
       lx.release(connObj, function(err){
         if(err){
           console.log(err);
         }
       });
     }
   )
 });
});
SELECT DETAIL FOR ONE BOOK
This query is under the path ‘/:id’, coming from the ISBN of the book. Regarding the database, it is a select query with a filter:
‘SELECT * FROM JESUS.LEANTABLE WHERE ISBN = ?’.
Here, we create a preparedStatement and then use the parameter value from the parameter of the HTTP GET request.
/* GET SINGLE BOOK BY ID */
router.get('/:id', function(req, res, next) {
 lx.reserve(function(err, connObj) {
   console.log('Using connection ' + connObj.conn);
   var conn = connObj.conn;
   asyncjs.series([
       function(callback) {
         conn.prepareStatement(GET_SINGLE_BOOK_BY_ID,function (err, statement) {
           if (err) {
             console.log(err);
             callback(err);
           } else {
             statement.setString(1,req.params.id, function(err){
               if(err){
                 console.log(err);
                 callback(err);
               }
             });
             statement.executeQuery(function (err, resultset) {
               if (err) {
                 console.error(err);
                 callback(err);
               } else {
                 resultset.toObjArray(function(err, results) {
                   if (results.length > 0) {
                     console.log(results);
                   }
                   res.json(results);
                   callback(null, resultset);
                 });
               }
             });
           }
         })
       }
     ], function(err, results) {
       lx.release(connObj, function(err){
         if(err){
           console.log(err);
         }
       });
     }
   )
 });
});
SAVE A NEW BOOK
This operation will translate into an insert statement that will receive the parameters for the preparedStatement from the body of the HTTP POST request. This POST request is filled in the angularJS frontend in a form. Regarding the previous operation, as this operation writes within the actual connection, it will set the autocommit to true for the connection. As an alternative to setting the autocommit, the commit can be handled manually and perform the commit once the insert statement is done. The code for this operation is the following:
/* SAVE BOOK */
router.post('/', function(req, res, next) {
 lx.reserve(function(err, connObj) {
   console.log('Using connection ' + connObj.conn);
   var conn = connObj.conn;
   asyncjs.series([
     function (callback) {
       conn.setAutoCommit(true, function (err) {
         if (err) {
           callback(err);
         } else {
           callback(null);
         }
       });
     },
   ], function (err, results) {
   });
   asyncjs.series([
       function(callback) {
         conn.prepareStatement(SAVE_BOOK, function (err, statement) {
           if (err) {
             console.log(err);
             callback(err);
           } else {
             statement.setString(1,req.body.ISBN, function(err){
               if(err){
                 console.log(err);
                 callback(err);
               }
             });
             statement.setString(2,req.body.TITLE, function(err){
               if(err){
                 console.log(err);
                 callback(err);
               }
             });
             statement.setString(3,req.body.AUTHOR, function(err){
               if(err){
                 console.log(err);
                 callback(err);
               }
             });

             statement.setString(4,req.body.PUBLISHED_YEAR.toString(), function(err){
               if(err){
                 console.log(err);
                 callback(err);
               }
             });
             statement.setString(5,req.body.PUBLISHER, function(err){
               if(err){
                 console.log(err);
                 callback(err);
               }
             });

             statement.executeUpdate(function (err, resultset) {
                 if (err) {
                   console.error(err);
                   callback(err);
                 } else {
                   res.json(req.body);
                   callback(null, resultset)
                 }
               });
           }
         })
       }
     ], function(err, results) {
       lx.release(connObj, function(err){
         if(err){
           console.log(err);
         }
       });
     }
   )
 });
});
UPDATE A BOOK
Following the CRUD operations, we will now take a look at UPDATE. As you might have guessed, to implement this operation we will use an UPDATE statement, using a preparedStatement and taking the parameters from the body of the HTTP PUT request.
/* UPDATE BOOK */
router.put('/:id', function(req, res, next) {
 lx.reserve(function(err, connObj) {
   console.log('Using connection ' + connObj.conn);
   var conn = connObj.conn;
   asyncjs.series([
     function (callback) {
       conn.setAutoCommit(true, function (err) {
         if (err) {
           callback(err);
         } else {
           callback(null);
         }
       });
     },
   ], function (err, results) {
   });
   asyncjs.series([
       function(callback) {
         conn.prepareStatement(UPDATE_BOOK, function (err, statement) {
           if (err) {
             console.log(err);
             callback(err);
           } else {
             statement.setString(5, req.body.ISBN, function(err){
               if(err){
                 console.log(err);
                 callback(err);
               }
             });
             statement.setString(1, req.body.TITLE, function(err){
               if(err){
                 console.log(err);
                 callback(err);
               }
             });
             statement.setString(2, req.body.AUTHOR, function(err){
               if(err){
                 console.log(err);
                 callback(err);
               }
             });
             statement.setString(3, req.body.PUBLISHED_YEAR.toString(), function(err){
               if(err){
                 console.log(err);
                 callback(err);
               }
             });
             statement.setString(4, req.body.PUBLISHER, function(err){
               if(err){
                 console.log(err);
                 callback(err);
               }
             });
             statement.executeUpdate(function (err, resultset) {
               if (err) {
                 console.error(err);
                 callback(err);
               } else {
                 res.json(req.body);
                 callback(null, resultset)
               }
             });
           }
         })
       }
     ], function(err, results) {
       lx.release(connObj, function(err){
         if(err){
           console.log(err);
         }
       });
     }
   )
 });
});
DELETE A BOOK
The only operation left to be implemented is DELETE. Like before, we get the ISBN of the book we want to delete from the parameter of the HTTP DELETE request and use a preparedStatement to execute a delete query.
/* DELETE BOOK */
router.delete('/:id', function(req, res, next) {
 lx.reserve(function(err, connObj) {
   console.log('Using connection ' + connObj.conn);
   var conn = connObj.conn;
   asyncjs.series([
     function (callback) {
       conn.setAutoCommit(true, function (err) {
         if (err) {
           callback(err);
         } else {
           callback(null);
         }
       });
     },
   ], function (err, results) {
   });
   asyncjs.series([
       function(callback) {
         conn.prepareStatement(DELETE_BOOK,function (err, statement) {
           if (err) {
             console.log(err);
             callback(err);
           } else {
             statement.setString(1,req.params.id, function(err){
               if(err){
                 console.log(err);
                 callback(err);
               }
             });
             statement.executeQuery(function (err, resultset) {
               if (err) {
                 console.error(err);
                 callback(err);
               } else {
                 res.json(resultset);
                 callback(null,resultset);
               }
             });
           }
         });
       }
     ], function(err, results) {
       lx.release(connObj, function(err){
         if(err){
           console.log(err);
         }
       });
     }
   )
 });
});
At last, we export the router module:
module.exports = router;
Application overview
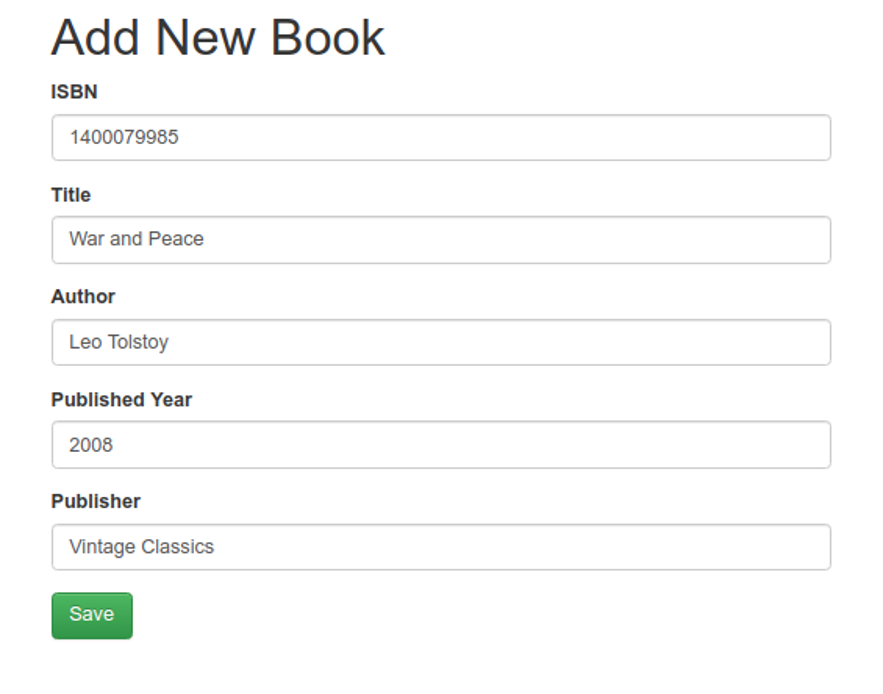
Here I show some screenshots of the final application following the flow of normal execution and also some screenshots of the data stored inside the LeanXcale database.


Conclusion
In this post, we have explained the benefits of using LeanXcale instead of MongoDB and we have created a CRUD web application using the well-known MEAN stack but substituting MongoDB with LeanXcale, creating the LEAN (LeanXcale+ExpressJS+AngularJS+Node.js) stack. In a simple way, we have been able to interact with the database from Node.js by using the JDBC driver as you can do in a Java program. Check the entire code available at our git repository. If you have any doubts when reading or executing the tutorial, please do not hesitate to contact me by using the contact information below.
Happy coding!
WRITTEN BY

Jesus Manuel Gallego Romero, Software Engineer at LeanXcale
jesus.gallego@leanxcale.com
Sponsored by LeanXcale